
How To Guide Print Templates & Downloads
Downloads:
External Links
- Crypto Logos on Github: https://github.com/spothq/cryptocurrency-icons/archive/refs/heads/master.zip
- Firefox (Offline QR Code Generator): https://addons.mozilla.org/en-US/firefox/addon/offline-qr-code-generator/
- David Shimjs Offline QR Code Generator: https://davidshimjs.github.io/qrcodejs/
- Frog Wallet Template Cartoon Design Outside:
- Frog Wallet Template Cartoon Design Inside:
- Frog Wallet Template Line Art Design Outside:
- Frog Wallet Template Line Art Design Inside:
- This Guide in PDF Format:
How To Print Using The Offline Printer Web Template Included With Your Purchase
Download files sent with your purchase and follow the video here:
How To Print Using The Printer Templates With Word
With your purchase, you should receive the following items.
- Standard 8.5 x 11 Paper Wallet Sheet
- 2 Clear Envelopes
- 2 Tamper Resistant Seals
- A link to download the printer templates
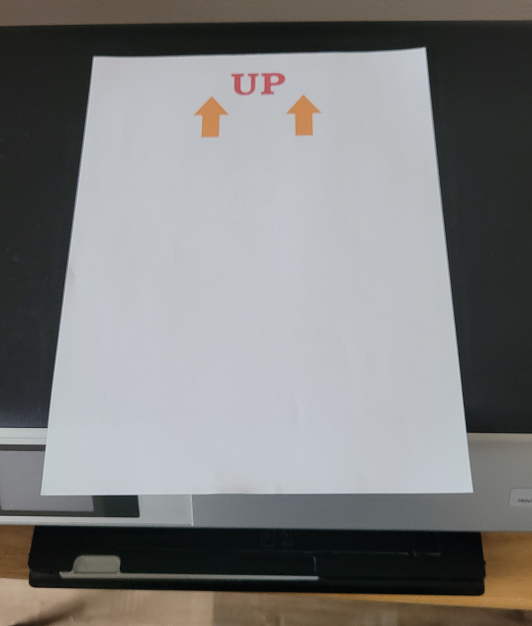
Step 1: Understand how your printer prints. Because every printer can be different and usually you are printing on blank paper you don’t have a reason to understand which side the paper the printer will print on. But since the Frog Wallets are pre-printed with designated areas we need to ensure you print the appropriate data on the appropriate side of the paper. To do this take a blank sheet of paper and mark it as UP indicating this is the side facing you, additionally with arrows pointing to the direction of the printer feed or the direction in which the paper goes into the printer.
Here is an example that we marked for this guide, you don’t need it to be fancy as ours, and simply marking it with a pen or pencil should suffice.
Next, open up the printer template labeled outside with Word. And using the default data included with the template print it to the piece of paper you marked UP.
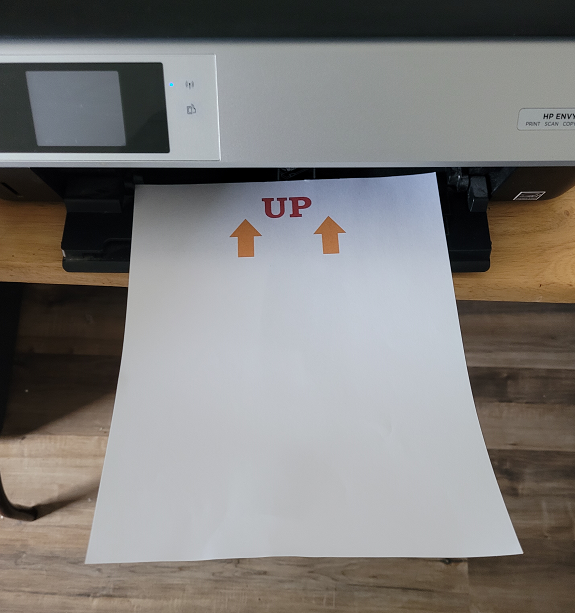
You may receive a notice from your printer that the print area is larger than the paper size and that some clipping may occur or that the print area is outside the margin. This is okay and was accounted for by careful placement of the print areas on each Frog Wallet. Click Yes to continue.
Once your blank page has been printed you should now know which side of the paper your printer prints too. In our case our printer prints to the side facing down. Remember which side your printer prints to going forward.
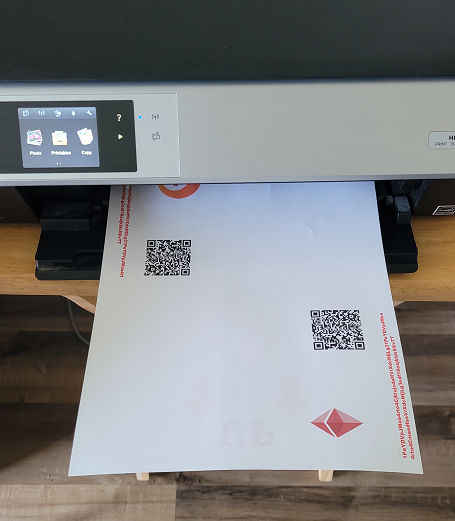
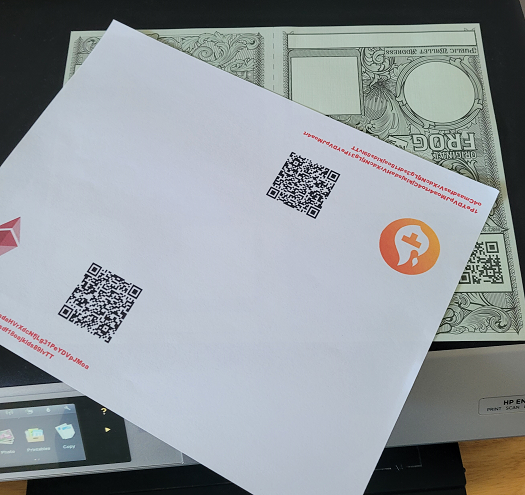
Step 2: Verify the sample you just printed will line up with the Frog Wallet. Using the same page you just printed with the default data lay it over the top of your Frog Wallet with a light source at the back to shine through both pages. In this picture, you should see that the QR code, Public Address, and Crypto Logos fall in nicely to the designated areas of the Frog Wallet.
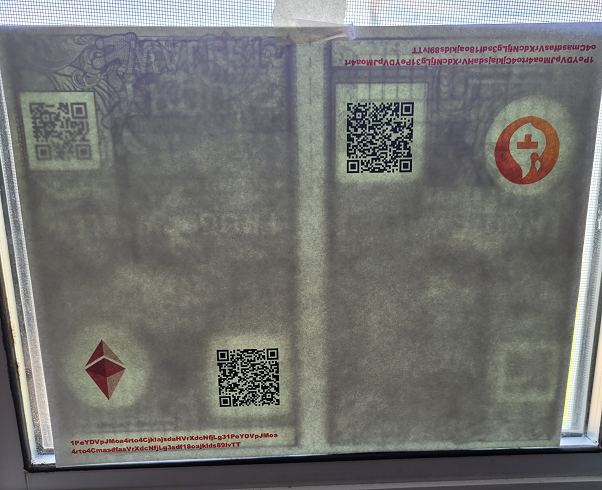
If you run into an issue with data alignment you can move the elements around in the template. We will discuss adding your data and how to move the elements around inside Word next.
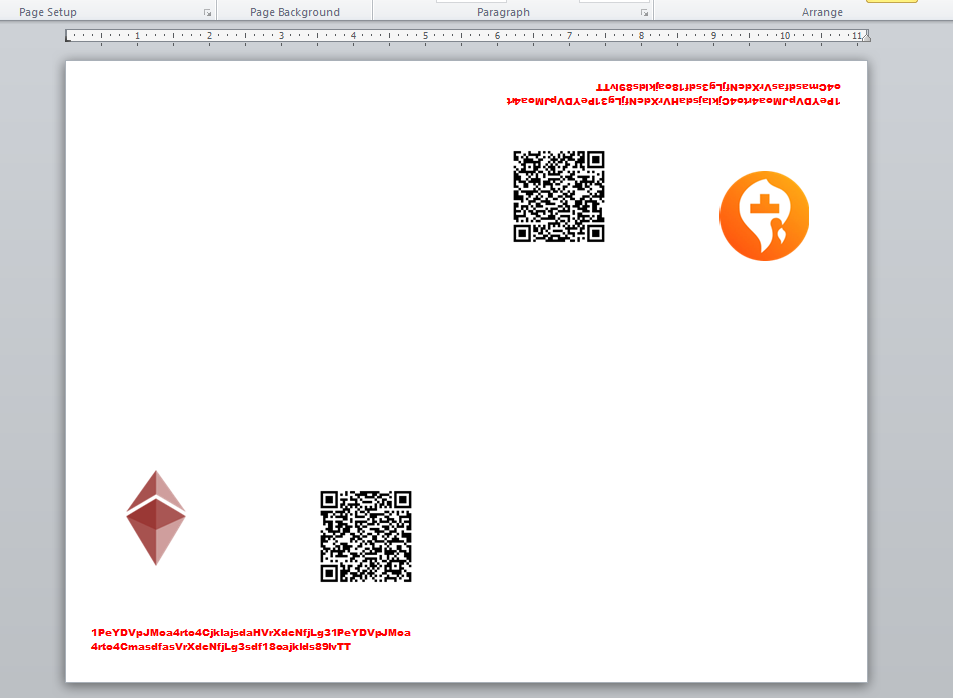
Step 3: Customize your template. If it is not already open, open the template labeled Outside with Word. It should look something like this.
Next, we are going to add your data.
First, let’s add our public key to the left-hand side. Remember each sheet contains 2 wallets so you may use 2 different public wallet addresses or you can create 2 identical Frog Wallets. In case you want to keep one in your home safe and the other in a bank deposit box for example. Simply copy your public key using Ctrl+C (pc) or CMD+C (mac). Next, click on the public key area on the left side wallet and select all the text (highlight the text).
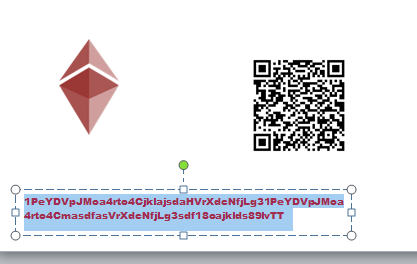
Now paste your copied public key over the sample data provided. *Note most public keys are not quite as long as the sample data.
Next, we want to get a QR code for our public key.
There are many ways to get a QR code online or offline, (see our frequently asked questions for other ways) for the sake of this guide, I’m simply going to
use Google’s development site to make one.
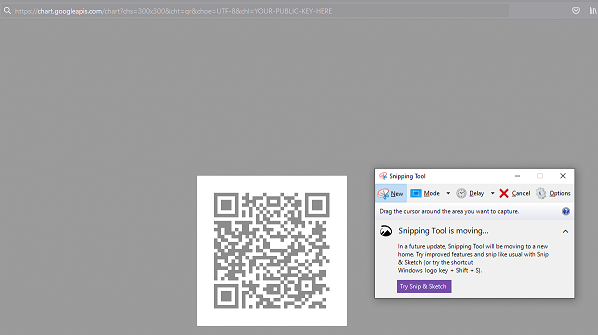
Head over to: https://chart.googleapis.com/chart?chs=300x300&cht=qr&choe=UTF-8&chl=ABCDEFGHIJKLMNOPabcdefghijklmnop123456789012345612345678901234561A
Now in your URL browser replace the string
“ABCDEFGHIJKLMNOPabcdefghijklmnop123456789012345612345678901234561A” with your
Public Key.
Simply highlight the text in your browser's URL or Address bar and paste your previously copied Public URL Code and hit enter.

Next, open your PC’s snipping tool (or Grab for Mac). Click new, and with your left mouse button held down drag a box around the displayed QR code. This will create a copy inside the snipping tool.
Inside the snipping tool click Edit->Copy.
Go back to Word with your open template and left-click in the middle to focus on word and hit paste CTRL+V for pc or CMD+V for mac. You should have pasted a copy of the QR code from the Snipping tool to Word.
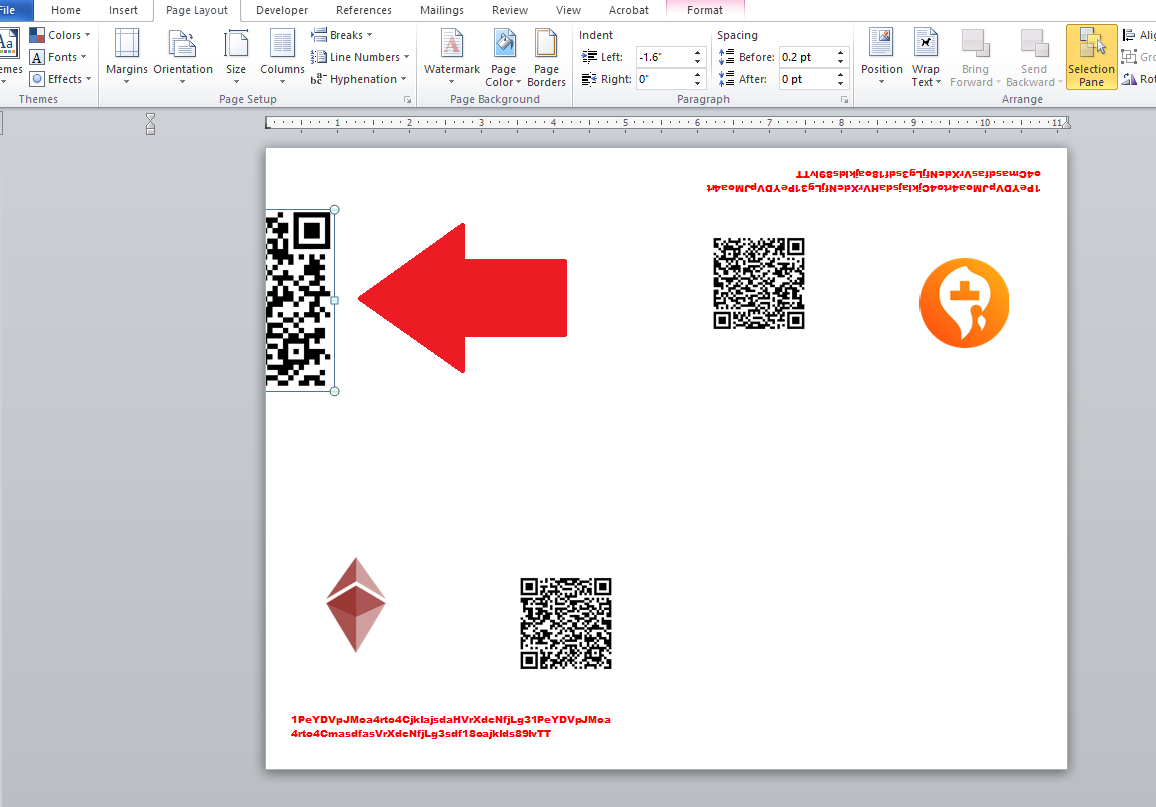
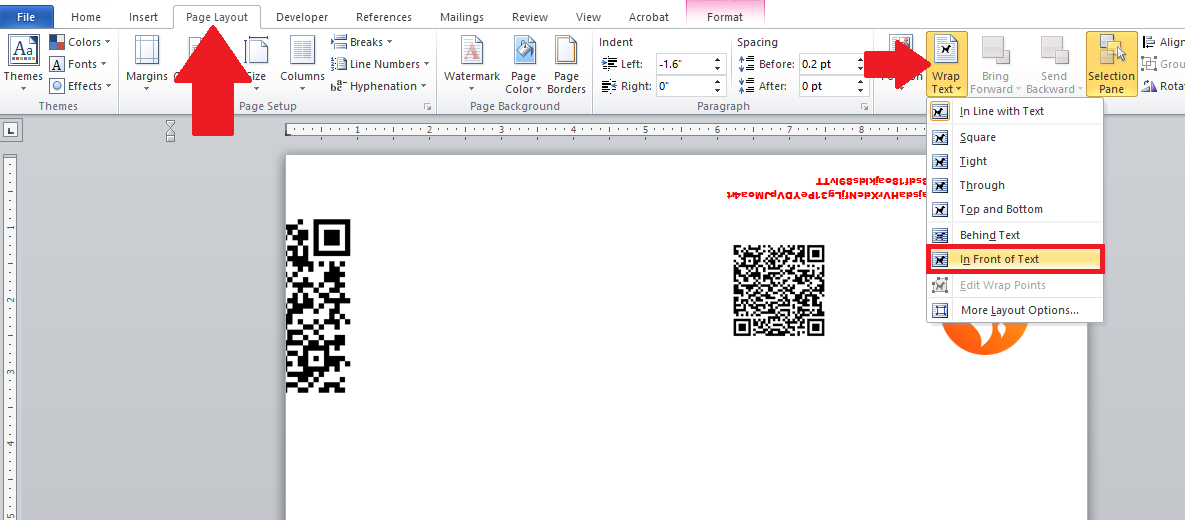
Next, select the pasted QR code by left-clicking on it. Word will default the layout to “In Line With Text” to fix that inside Word go to Page Layout tab -> Wrap Text and select “In Front of Text”.
Your QR code should now be able to be moved. Click on the pasted QR code and drag it on top of the template's QR code on the left.
The QR code may be a little large; to fix that you can simply select the QR code by left-clicking it, and grab the corner of the image with your left mouse key held down, and drag the bottom corner towards the middle and your image should reduce in size. Move and adjust the size of your QR code using this method until it is large enough to cover up the one provided with the template.

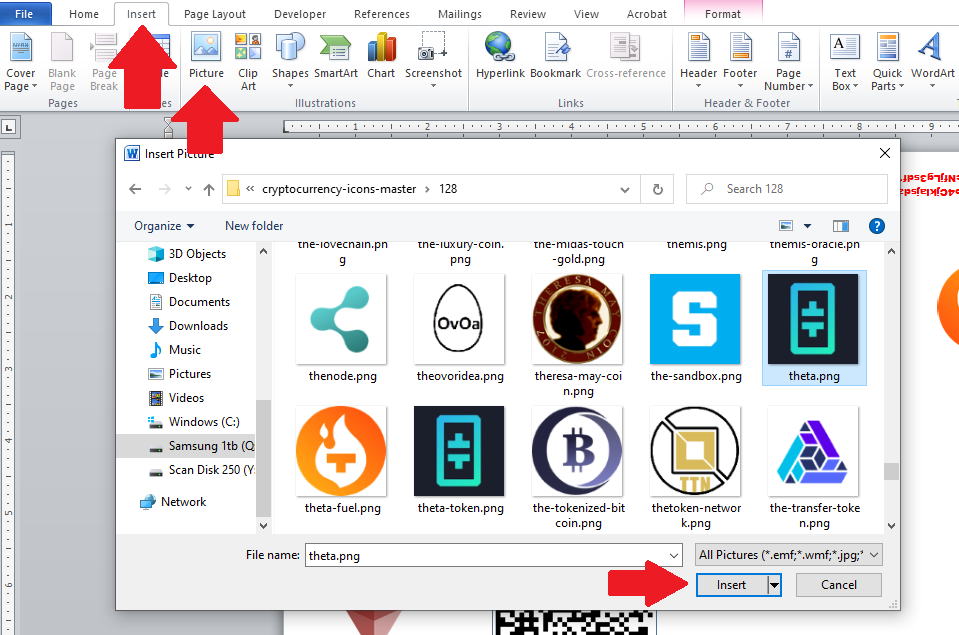
Now we want to add our logo to the left side. You can use any logo you like, but in our case let us use the Theta Token logo. You may download over 600 crypto logos from Github here: https://github.com/spothq/cryptocurrency-icons/archive/refs/heads/master.zip
To insert the crypto logo or whatever logo you want to use for this wallet, inside Word go to the “Insert Tab->Picture” and navigate to the location of your image. Once found click open.
Once again, Word will put the image “In Line With Text” by default this may cause your Image not to appear. To fix that inside Word go to the Page Layout tab -> Wrap Text and select “In Front of Text”. Depending on the size of your logo, Word may place the image outside of the visible area, all you have to do is hold down the left mouse key and drag it to the center of the page as it should already be selected for you.
Now just like with the QR code resize it and place it on top of the default logo in the template.
![]()
Repeat all these steps for the right side wallet.
Save your Word template so you can return it later if needed.
*Recommended. We recommend you print another blank piece of paper with your information and lay it over the Frog Wallet sheet as before to ensure everything will line up. If not you can return to the template and make adjustments.
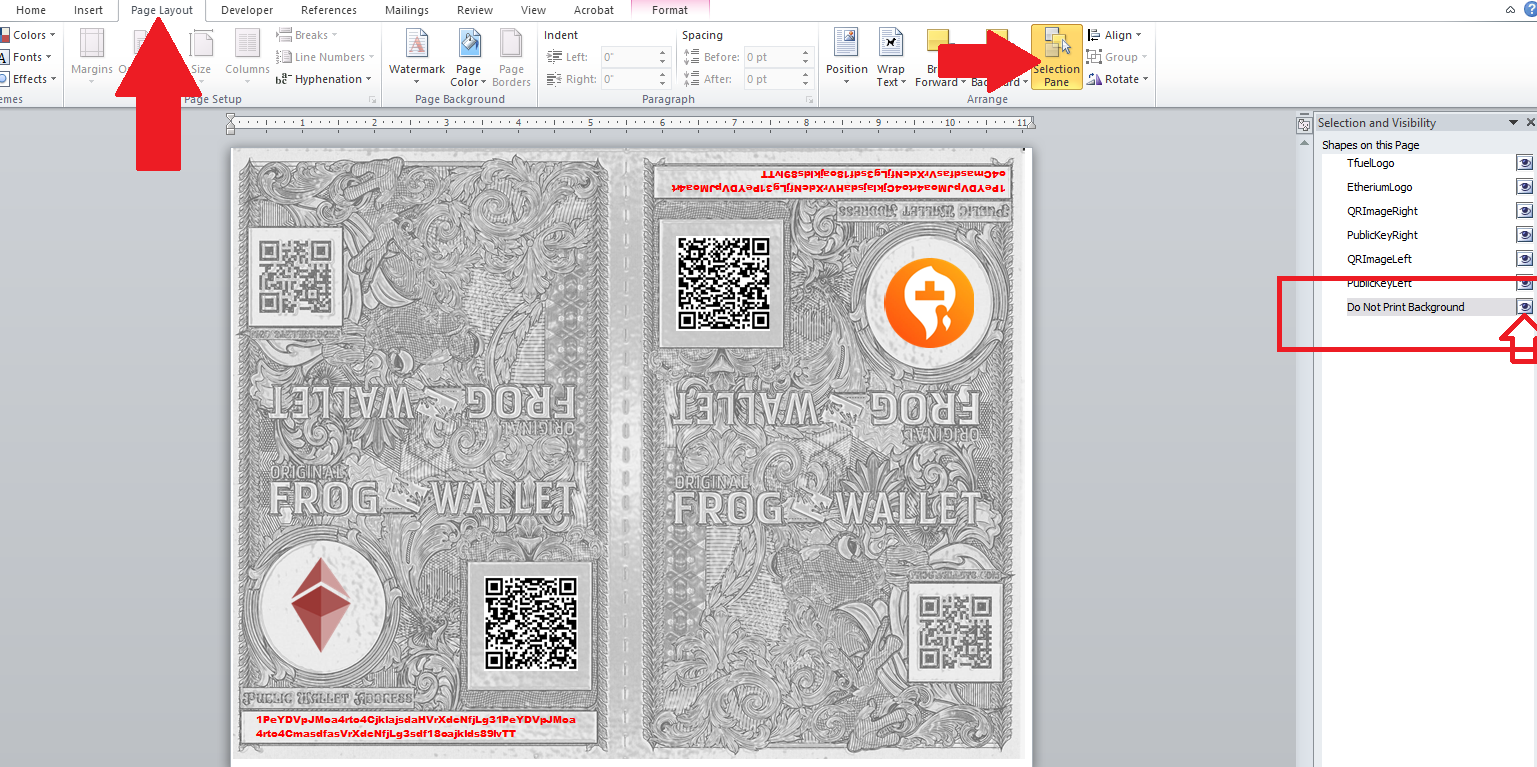
**Optional we have included a background image in the template. However, it will be off by default. To enable the background image which has the locations of the printer areas do the following. Inside Word go to the “Page Layout Tab” and click “Selection Pane”. This will bring up a layered Window showing the elements on the document. You can toggle the image ON by clicking the checkbox. This should verify for you that your QR code, Public Address, and Logos are in the correct placements. This background image will be grainy and blurry by design and is not intended to be printed. Make sure before you load your Frog Wallet into the printer you turn this off, or it will ruin your print. To turn this off simply click/toggle the checkbox on the layer named "Do Not Print Background".
To print the inside of the Frog Wallet, you’ll need your private key, password, and/or mnemonic phrase (seed phrase). Just open the Inside Wallet template and follow these instructions again for each area you need to print.
Lastly, with the optional stage above turned off, load your Frog Wallet Paper into the printer be sure that you load it properly based on the side and direction your printer will print to. Refer to step 1 if you have forgotten. Now simply print your information to the outside of the Frog Wallet.